Mount Rainier Gear List
Climbing Mount Rainier is an incredible achievement. The mountain is the highest peak in Washington at 14,410 ft. tall, and is guarded by huge glaciers on all sides (fun fact: it is the heaviest glaciated peak in the lower 48). Our team here at OTC has 8 successful Rainier summits between us, and have learned—sometimes the easy way, sometimes the hard way—what gear works and what doesn’t. Here are our top recommendations.
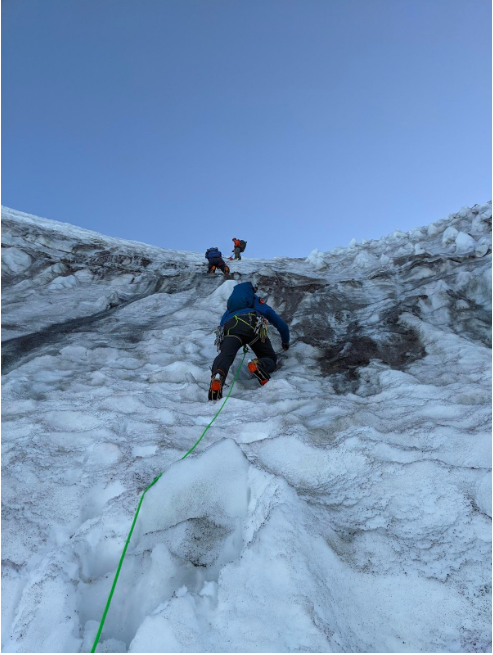
Ryan leading the second pitch of ice on the Kautz route in a single push ascent of the mountain. Notice the 15l running pack.
The gear you will need can be split into the following categories:
Climbing and Protection
This is the gear that allows you to safely climb the mountain and protects you in the case of a fall. Think rope, crevasse rescue kit, boots and crampons.
Clothing/Personal Kit
Jackets, layers, headlamp, hygiene kit, etc. Basically anything that you will be using for your own personal care/comfort. The ideal clothing setup is one that integrates with your other gear categories. For example, your clothing can work with your sleeping setup to help you stay warmer or allow you to carry a lighter sleeping bag.
Sleeping Setup
What you need to sleep: sleeping bag, sleeping pad, tent, etc.
Cooking/Water
The gear you need to cook food and boil water.
Depending on your skills and/or comfort requirements, there is the potential to cut a lot of weight in all of these areas. We are firm believers that the less weight you have to carry up the mountain, the more fun the climb tends to be.

We get really nerdy with our trips. This gear list for Liberty Ridge was from 2017.
Mount Rainier Packing List
Note: None of the recommendations below are paid in any way.
Climbing and Protection
Emergency Beacon. We’re big fans of the Garmin InReach Mini.
Rope. Typically a 30 Meter glacier line is more than adequate for routes on Rainier. We absolutely love the Beal Gully, but this may be a bit thin for some people. Make sure that the diameter rope you choose works in both your belay devices, and with your crevasse rescue kit.
Harness. A lightweight harness like this or this is more than sufficient for most routes
Crampons. Horizontal, steel, 12 point crampons are the name of the game. All the major companies make them and they are more or less all equal.
Helmet
Crevasse Kit
Pulley(s) (1-2 depending on the crevasse rescue techniques you plan on using)
Cordelette
Ice Screw (depending on route)
2-4 Locking Carabiners
4-8 Non-Locking Carabiners
2 Full-Length Slings
Mountaineering Tool
Pickets (1-2 per person). We like pickets with a steel cable attached such as this.
Belay device
Clothing
Backpack—many places will tell you that you need a 65- to 75-liter pack for Rainier. This is true if you plan on spending multiple nights on the peak or if you choose all the heaviest/biggest gear that you possibly can. The most common size we have used on Rainier is 45L.
Boots—the season and weather will largely dictate which type of boot is ideal for your trip.
Synthetic underwear
Baselayer top (1 per day on the mountain)
Baselayer bottom (1 per day on the mountain)
Midlayer
Windshell
Shell
Softshell pants
Parka
Light Gloves
Midweight gloves
Mitts (these are amazing. We call them the microwaves.)
Socks—Liner and normal. 1 set per day on the mountain.
Buff
Optional:
Gaiters
Rain/hardshell pants
Personal Kit
Headlamp + extra batteries
First Aid Kit
Lightweight Emergency Bivy—SOL makes a tiny one. This potentially could be a lifesaver.
Sunglasses
Sunscreen
GPS (on phone)
Altimeter Watch
Water bottle (2). It’s useful to have a hard type bottle, as well as a soft flask type.
Trekking pole
Battery pack for phone and headlamp
Map of route and compass
Personal hygiene kit (toothbrush, etc.)
Wag bags (human waste disposal system)
The 10 essentials. Because no gear list would be complete without adding these.
Sleeping Setup
Tent—backpacking tents can work, but dedicated mountaineering tents will handle wind better.
Sleeping bag—0- to 30-degree depending on weather and personal comfort. We commonly use 15-degree bags.
Sleeping pad—A high quality, high R-value pad will allow you to bring a lighter sleeping bag because it insulates you from the ground.
Cooking Setup
Backpacking stove and fuel. Remember, you will have to melt water when making your fuel calculations. We have had good luck with canister-style stoves during our climbs, but just beware of their limitations. In our experience, they tend to start having issues above 12,000 ft, but it really just depends on the stove.
Water filter. Optional, but highly recommended.
Cooking pot. Depending on food and stove type.
Eating utensils
Lighter

Modern gear technology has made it possible to save substantial weight without sacrificing safety. For example, there are many different mountaineering tools on the market, and depending on your choice, you could potentially save almost a full pound in that one decision.
The same goes for tents and sleeping bags: Decide what you need, then try and find the lightest option that meets these standards. Oftentimes lightweight gear is less durable than heavier gear, though this gap is closing as materials and engineering improve. We generally think that sacrificing durability is better than carrying something heavy, so this tradeoff is worth it for us. Ultimately, where, how, and what you decide to carry is up to you, so be sure to leave yourself the biggest safety margin you can.
Check out these other articles on Rainier!


All the gear to climb Mount Rainier! A simple list split into categories including: climbing and protection, clothing/personal kit, sleeping setup, and cooking/water. Includes links to purchase gear.